Let’s be honest: chicken breast gets a bad rap.
Too often, it’s synonymous with dry, rubbery, flavorless meat that you have to choke down in the name of health.
But it doesn’t have to be that way!
I am going to show you exactly how to transform this humble, lean protein into something juicy, golden-brown, and absolutely delicious.
This is the method I use in my kitchen almost every single week for salads, grain bowls, and quick weeknight dinners.
It’s all about technique, temperature, and a little bit of love.
Once you master this, you’ll never suffer through a dry piece of chicken again.
Ready to change your dinner game?
Let’s get cooking!
Why You’ll Love This Recipe
There is a reason this specific method of sautéing chicken is a staple in my home. It checks every single box for a healthy, busy lifestyle. Here is why I know you are going to put this on your weekly rotation:
- It’s Incredibly Fast: We are talking dinner on the table in under 20 minutes. No long marinating times required (unless you want to!), and the actual cook time is usually less than 10 minutes.
- Maximum Juiciness: By following my tips on thickness and resting, you lock in the moisture. This isn’t that sad, gray chicken you get at a cafeteria; this is restaurant-quality succulence.
- Endlessly Versatile: This is a “blank canvas” recipe. Once you have the technique down, you can swap the seasonings to fit any cuisine—Mexican, Italian, Asian, or classic American.
- Macro-Friendly: For my Weight Watchers fam and macro-counters, this is the holy grail. It is high in protein, zero carb (depending on seasoning), and low in fat, leaving you plenty of room for delicious sides.
- Meal Prep Gold: This chicken holds up beautifully in the fridge. I usually make a double batch on Sunday so I have protein ready for lunch salads and wraps for the next three days.
- Budget Conscious: Boneless, skinless chicken breast is often on sale. When you know how to cook it well, you don’t need expensive cuts of meat to make a gourmet-tasting meal.
Ingredients Required
The beauty of a perfect sauté lies in its simplicity. You don’t need a pantry full of exotic items. However, because the ingredient list is short, the quality and the handling of those ingredients matter immensely. Here is what you need and, more importantly, why you need it.
The Essentials
- Boneless, Skinless Chicken Breasts:
- Why: This is our star. It’s lean and packed with protein.
- Tip: Try to buy air-chilled chicken if your budget allows. Air-chilled chicken contains less water than water-chilled chicken, which means it browns better in the pan and doesn’t steam itself. If you can only find standard chicken, don’t worry—I have a drying tip for that later! Look for breasts that are pinkish (not gray) and springy to the touch.
- Extra Virgin Olive Oil (or Avocado Oil):
- Why: You need fat to conduct heat and prevent sticking. I love EVOO for its flavor and heart-healthy properties.
- Tip: If you are cooking at a very high heat, Avocado Oil has a higher smoke point (500°F) compared to Olive Oil (375°F). For a standard sauté, olive oil is perfectly fine, but if you like a hard sear, go with avocado.
- Kosher Salt:
- Why: Salt is not just for saltiness; it is a flavor enhancer and a tenderizer. It helps break down muscle fibers.
- Tip: I always use Diamond Crystal Kosher Salt. The grains are larger, making it harder to over-salt your food compared to fine table salt. If you are using table salt, cut the amount in half!
- Freshly Cracked Black Pepper:
- Why: It adds that subtle bite and heat. Pre-ground pepper loses its volatile oils quickly. Freshly cracked makes a huge difference.
- Garlic Powder & Onion Powder:
- Why: Fresh garlic burns quickly in a hot sauté pan, turning bitter. Granulated garlic or powder gives you that savory, umami flavor without the risk of burning.
- Dried Oregano or Italian Seasoning:
- Why: This adds an herbaceous note that makes the kitchen smell amazing. Rub the dried herbs between your fingers before sprinkling to release their oils.
- Paprika (Sweet or Smoked):
- Why: Aside from a lovely subtle flavor, paprika aids in browning, giving the chicken that appetizing golden-red hue.
Variations & Substitutions
Cooking is about making the recipe work for you. Here are some ways to switch it up based on your dietary needs or cravings:
- The “Crispy” Variation (Light Breading):
- If you miss the crunch of fried chicken, dredge the chicken lightly in flour (or almond flour/arrowroot powder for Gluten-Free/Paleo) before sautéing. This creates a thin crust that grabs onto sauces beautifully.
- Make it Dairy-Free / Whole30:
- The core recipe is already dairy-free! Just ensure you are using oil or Ghee, not butter.
- The “Butter Finish”:
- For an indulgent twist, sauté in oil, but add 1 tablespoon of butter to the pan in the last minute of cooking. Baste the chicken with the foaming butter. It adds a nutty, rich finish that is undeniable.
- Flavor Profiles:
- Mexican: Swap oregano for cumin and chili powder. Squeeze fresh lime at the end.
- Asian: Use sesame oil instead of olive oil. Season with ginger powder and brush with soy sauce or coconut aminos right at the end.
- Cajun: Use a pre-mixed Cajun spice blend (watch the sodium!) for a spicy kick.
How to Prepare: The Step-by-Step Guide
This is the most important section. You can have the best ingredients in the world, but if you throw a cold, thick chicken breast into a lukewarm pan, you will fail. Follow these steps religiously for the best results.
Step 1: The Pound Down (Crucial!)
Chicken breasts are naturally uneven—thick at one end and tapered at the other. If you cook them as-is, the thin end will be dry like leather before the thick end is safe to eat.
- The Fix: Place your chicken breasts on a cutting board and cover them with a sheet of plastic wrap or parchment paper (to prevent raw juice splatter).
- Using the flat side of a meat mallet, a rolling pin, or even the bottom of a heavy skillet, gently pound the thickest part of the chicken.
- Goal: You want the breast to be an even thickness, roughly ½ to ¾ inch thick all the way across. This ensures everything cooks at the exact same rate.
Step 2: The Dry Pat
Moisture is the enemy of the sear. If your chicken is wet, the water must evaporate before the meat can brown. This creates steam, which results in gray, boiled-looking meat.
- The Fix: Take paper towels and thoroughly pat both sides of the chicken dry. I mean really dry. Do this right before you season.
Step 3: Season Generously
Because we are cooking quickly, we want the flavor to be impactful.
- Mix your salt, pepper, garlic powder, onion powder, oregano, and paprika in a small bowl.
- Sprinkle the mixture evenly over both sides of the chicken. Press the seasoning into the meat gently with your hand so it sticks.
Step 4: The Pan and The Heat
- Use a large skillet. Stainless steel or cast iron are best for browning, but a good non-stick pan works great for a lower-fat option.
- Heat the pan over medium-high heat.
- Add your oil. Let the oil heat up until it shimmers and moves loosely around the pan. If you see wisps of smoke, it’s too hot—pull it off the heat for a moment.
- The Sizzle Test: If you drop a tiny corner of the chicken in and it doesn’t sizzle immediately, wait! The pan isn’t ready.
Step 5: The Sear (Don’t Touch It!)
- Place the chicken breasts in the pan. Do not overcrowd the pan. If the pieces are touching, they will steam. Cook in batches if necessary.
- Here is the hardest part: Do not touch the chicken for at least 3 to 4 minutes.
- You need to let the Maillard reaction happen (that’s the science-y term for browning). If you try to flip it too early, the chicken will stick to the pan. When it releases easily, it’s ready to flip.
- Flip and cook the other side for another 3 to 4 minutes.
- Note: If the chicken is browning too fast but not cooked through, turn the heat down to medium.
Step 6: The Temperature Check
- Don’t guess! Use an instant-read meat thermometer.
- Insert the probe into the thickest part of the meat. You are looking for 160°F (71°C).
- Wait, isn’t it 165°F? Technically, yes. But we are going to pull it at 160°F because of carryover cooking.
Step 7: The Rest
- Remove the chicken from the pan and place it on a clean plate or cutting board.
- Tent it loosely with foil.
- Let it rest for 5 full minutes. During this time, the internal temperature will rise to the safe 165°F, and the juices—which have bunched up in the center of the meat during cooking—will redistribute throughout the breast. If you cut it immediately, those juices run out onto the board, leaving your meat dry.
Cooking Methods: Alternatives to the Saute
While sautéing is my go-to for that golden crust, I know we all have different appliances we love. Here is how to adapt this recipe for other methods while keeping the flavor profile high.
1. Air Fryer Method
- Why use it: It’s hands-off and uses less oil.
- How to: Preheat Air Fryer to 375°F. Spray the seasoned chicken with a little oil spray. Cook for 10-12 minutes, flipping halfway through.
- Verdict: Very juicy, but you won’t get the same deep, caramelized crust as a skillet.
2. Oven Method (Baked)
- Why use it: Great for cooking large batches (meal prep) at once.
- How to: Preheat oven to 400°F. Place pounded, seasoned chicken on a parchment-lined baking sheet. Bake for 18-22 minutes depending on thickness.
- Pro Tip: For the best of both worlds, sear the chicken in an oven-safe skillet for 2 minutes per side, then transfer the skillet to the oven to finish cooking (about 10 minutes).
3. Instant Pot (Pressure Cooker)
- Why use it: Best for shredded chicken, not whole breasts.
- How to: Add 1 cup of chicken broth to the pot. Add seasoned chicken. Cook on High Pressure for 8-10 minutes. Quick release.
- Verdict: This will be poached/steamed chicken. It won’t have a crust, but it will be incredibly tender and perfect for shredding into tacos or soups.
4. Slow Cooker
- Why use it: Set it and forget it.
- How to: Place chicken in the bottom. Add ½ cup broth or salsa. Cook on Low for 3-4 hours.
- Warning: Lean chicken breasts dry out easily in a slow cooker if left too long. I actually prefer chicken thighs for this method, but if you use breasts, check them at the 3-hour mark.
Storage & Meal Prep
Since we are putting in the effort to make delicious chicken, let’s make sure it stays delicious for leftovers.
Storing in the Fridge
- Cool Completely: Never put hot chicken directly into a plastic container and seal it. It will sweat, creating moisture that breeds bacteria and makes the chicken soggy. Let it cool to room temperature (about 30 minutes).
- Containers: I prefer glass airtight containers. They don’t stain or hold odors like plastic does.
- Whole vs. Sliced: If possible, store the chicken breasts whole. Slicing them exposes more surface area to the air, which dries the meat out faster. Slice them only when you are ready to eat.
- Duration: Properly stored, sauteed chicken will last 3 to 4 days in the refrigerator.
Freezing Tips
- This chicken freezes beautifully!
- Flash Freeze: Lay the cooked, cooled breasts on a baking sheet not touching each other. Freeze for 1 hour until solid. Then transfer them to a freezer-safe bag. This prevents them from freezing into one giant ice block.
- Duration: Best used within 3 months for optimal flavor.
Reheating (The Danger Zone)
Reheating is where good chicken goes to die.
- Microwave: If you must microwave, do not blast it on high. Sprinkle a few drops of water or broth over the chicken, cover it with a damp paper towel, and heat on 50% power in 30-second intervals.
- Stovetop: This is the best way. Add a splash of water or broth to a skillet over medium-low heat. Add the chicken and cover with a lid. The steam will gently warm the chicken through without drying it out.
Comprehensive FAQ Section
I get asked questions about chicken constantly! Here are the most common troubleshooting tips and queries to ensure your success.
Q1: Why is my chicken always rubbery? A: This usually happens for two reasons: overcooking or under-pounding. If the chicken is too thick, the outside gets tough before the inside is done. If you cook it past 165°F, the proteins tighten up and squeeze out all the moisture. Use a meat mallet and a thermometer!
Q2: Can I use chicken thighs instead? A: Absolutely! Boneless, skinless chicken thighs are more forgiving because they have higher fat content. You can use the exact same seasoning and method, but thighs usually take 1-2 minutes longer to cook than breasts.
Q3: Do I need to wash my chicken before cooking? A: Please, no! The CDC advises against washing raw poultry. It doesn’t kill bacteria (cooking does that), but the splashing water spreads raw chicken bacteria (salmonella) all over your sink, faucet, and countertops. Just pat it dry with paper towels.
Q4: My chicken sticks to the pan. What am I doing wrong? A: You likely tried to flip it too soon. Protein forms a bond with the metal pan when it first hits the heat. Once the crust forms (the Maillard reaction), it naturally releases. If you have to pry it off, give it another minute. Also, ensure your oil is hot enough before adding the meat.
Q5: Can I marinate this chicken first? A: Yes, you can. A simple marinade of olive oil, lemon juice, garlic, and herbs is lovely. However, if you marinate, you must wipe the excess liquid off the chicken before sautéing, or it will steam instead of sear.
Q6: Is it safe if the chicken is slightly pink inside? A: Color is not a reliable indicator of safety. Texture and temperature are. Sometimes, especially near the bone or in younger chickens, the meat can remain pinkish even when cooked to a safe 165°F. Trust your thermometer, not your eyes.
Q7: How do I get that golden brown crust without burning the spices? A: Great question. Paprika and garlic powder can burn. The trick is medium-high heat, not “scorching high” heat. Also, ensure there is enough oil in the pan to conduct the heat evenly. If you find your spices burning, try seasoning the chicken with salt and pepper first, searing it, and adding the garlic/herb butter at the very end.
Q8: Can I use frozen chicken breasts? A: You cannot sauté from frozen. The outside will burn while the inside is raw. You must thaw them completely in the fridge overnight or in a bowl of cold water before cooking.
Q9: What is the white stuff that comes out of the chicken while cooking? A: That is albumin, a soluble protein. It’s totally harmless and safe to eat. It usually appears when the chicken is cooked too quickly or aggressively, squeezing the protein-filled moisture out.
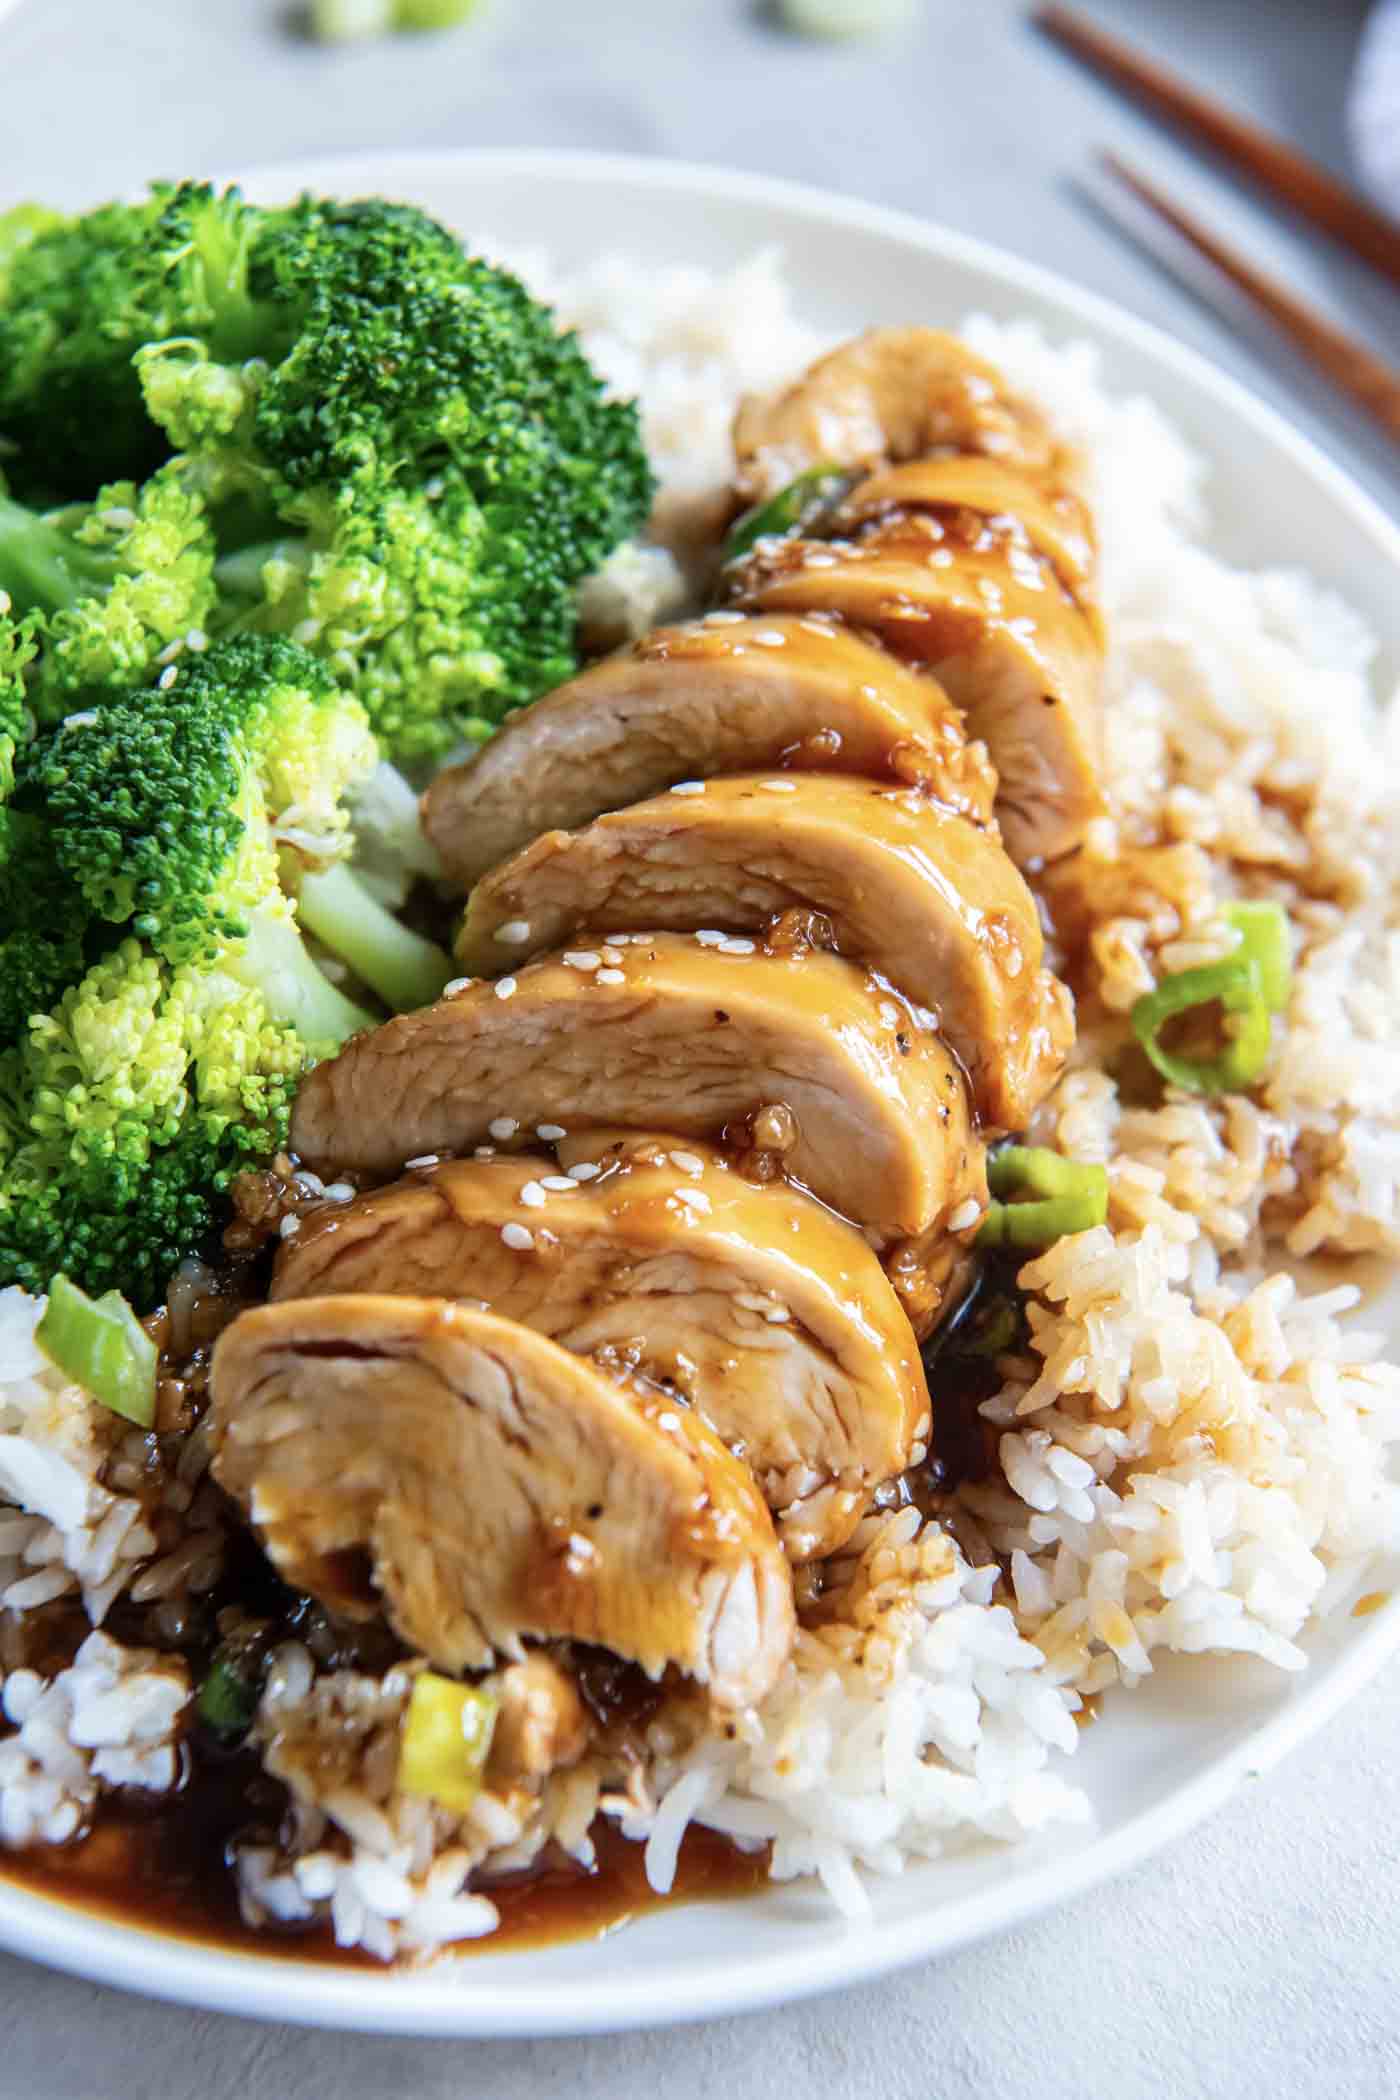
Q10: What are the best sides to serve with this? A: The options are endless! I love this with my [Roasted Broccoli with Garlic], a simple [Quinoa Salad], or sliced over a [Caesar Salad]. For a heartier meal, serve it alongside roasted sweet potatoes or pasta.
Recipe Card Summary
Prep Time: 10 minutes
Cook Time: 10 minutes
Resting Time: 5 minutes
Total Time: 25 minutes
Servings: 4
Nutrition Highlight (Per Serving):
- Calories: ~220 kcal
- Protein: 26g
- Carbohydrates: 1g
- Fat: 11g
- Fiber: 0.5g
- Note: Nutrition may vary based on the specific brand of oil and size of chicken breasts used.
Ingredients
- 2 large boneless, skinless chicken breasts (about 1 lb total)
- 1.5 tbsp Extra Virgin Olive Oil
- 1 tsp Kosher Salt (adjust to taste)
- ½ tsp Freshly Cracked Black Pepper
- ½ tsp Garlic Powder
- ½ tsp Onion Powder
- ½ tsp Dried Oregano
- ½ tsp Paprika (Sweet or Smoked)
Instructions
- Prep the Chicken: Place chicken breasts on a cutting board covered with plastic wrap. Pound the thickest parts until the chicken is an even ½ to ¾ inch thickness.
- Dry: Pat the chicken thoroughly dry with paper towels.
- Season: In a small bowl, mix the salt, pepper, garlic powder, onion powder, oregano, and paprika. Rub the seasoning evenly over both sides of the chicken.
- Heat: Heat a large skillet over medium-high heat. Add the olive oil and swirl to coat.
- Cook: Once the oil is shimmering, add the chicken breasts. Do not crowd the pan. Cook undisturbed for 3-4 minutes until a golden crust forms and the chicken releases easily from the pan.
- Flip: Flip the chicken and cook for another 3-4 minutes on the second side.
- Check: Use a meat thermometer to check for an internal temperature of 160°F.
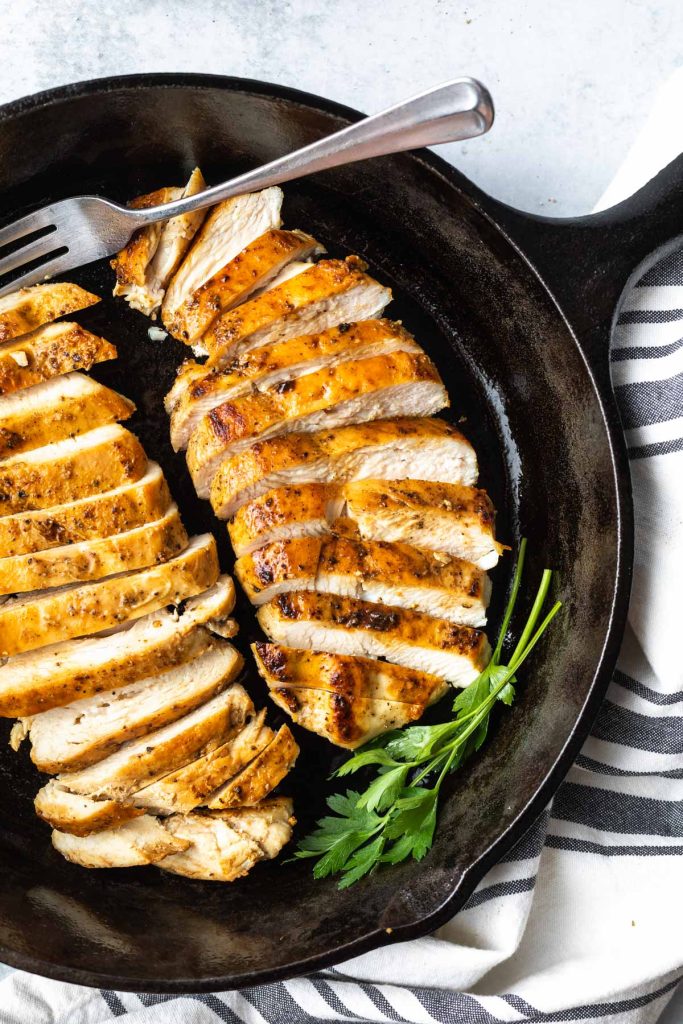
- Rest: Remove from heat, transfer to a plate, and tent with foil. Let rest for 5 minutes before slicing.
There you have it, guys! The secret to the juiciest, tastiest sautéed chicken breast is finally yours.
I really hope you give this a try. It’s one of those foundational recipes that, once you master, makes healthy eating so much easier and more enjoyable.
I love seeing your creations and hearing how you spiced it up.