You want something healthy, but the allure of takeout is strong.
This is exactly why I developed this Honey Garlic Chicken Breast recipe.
It is the ultimate weeknight savior.
We are talking about sticky, sweet, savory perfection.
It comes together in under 20 minutes.
And the best part?
It uses ingredients you likely already have in your pantry right now.
If you have struggled with dry, flavorless chicken breast in the past, get ready to have your mind changed.
This recipe guarantees juicy, tender bites coated in a glossy, garlic-infused sauce that rivals your favorite local Chinese takeout spot, but with a fraction of the calories and sodium.
Let’s get cooking!
Why You’ll Love This Recipe
I know there are a million chicken recipes on the internet, but this one holds a special place in my weekly rotation. Here is why I think it will become a staple in your kitchen, too:
- Pantry Friendly: No hunting for obscure ingredients. Honey, soy sauce, garlic, and vinegar are the stars here.
- High Protein, Low Fat: By using boneless, skinless chicken breast, we keep the points low and the protein high, making this incredibly filling without weighing you down.
- Kid-Approved: The natural sweetness of the honey masks the “healthiness” of the meal. My kids lick their plates clean—and usually ask for seconds.
- Incredibly Versatile: You can serve this over brown rice, quinoa, cauliflower rice, or even spiralized zucchini noodles.
- Meal Prep Gold: This chicken reheats beautifully, staying moist and flavorful for days, making it perfect for office lunches.
- Customizable: Whether you like it spicy, extra garlicky, or gluten-free, this base recipe is incredibly easy to tweak to your specific dietary needs.
Ingredients Required
To get that perfect balance of sweet and savory, every ingredient plays a specific role. Here is exactly what you need and, more importantly, why we use it.
The Core Ingredients
- Boneless, Skinless Chicken Breast: The canvas for our masterpiece. I recommend buying high-quality, air-chilled chicken if your budget allows, as it releases less water during cooking and browns better. You’ll want about 1 to 1.5 pounds.
- Honey: This provides the “sticky” factor and the sweetness. Use a regular clover honey or wildflower honey. Avoid raw honey here, as we are cooking it at high heat, which destroys the raw properties anyway. The sugar in the honey caramelizes to create that beautiful glaze.
- Fresh Garlic: Please, I beg you, use fresh garlic cloves! Jarred garlic just doesn’t have the same punchy, aromatic quality. We are using 4 to 6 cloves (measure with your heart!) to really drive that flavor home.
- Low-Sodium Soy Sauce: This is crucial. Regular soy sauce can make the dish incredibly salty once the sauce reduces. Using low-sodium allows us to control the seasoning. It adds that deep umami flavor and the rich dark color.
- Apple Cider Vinegar (or Rice Vinegar): You need acid to cut through the sugar of the honey. This brightens the dish and adds a subtle tang that balances the profile so it isn’t cloyingly sweet.
- Cornstarch: This is our thickener. It turns the liquid mixture into a glossy glaze that clings to the meat rather than slipping off.
- Olive Oil: For searing the chicken. You can also use avocado oil, which has a higher smoke point.
Optional Garnishes
- Green Onions (Scallions): For a pop of color and a fresh, oniony bite at the end.
- Sesame Seeds: Toasted seeds add texture and make the dish look professionally plated.
Variations & Substitutions
I know many of you have specific dietary needs, so here is how to swap things out without losing flavor:
- Gluten-Free: Swap the soy sauce for Tamari or Coconut Aminos. If using Coconut Aminos, you might want to add a pinch of salt, as it is sweeter and less salty than soy sauce. Ensure your cornstarch is certified GF.
- Vegan/Vegetarian: Believe it or not, this sauce is amazing on extra-firm tofu or tempeh. Press the tofu to remove water, cube it, and follow the same cooking instructions. Swap honey for agave or maple syrup (though maple will change the flavor profile slightly).
- The “Spicy” Kick: If you love heat, add a teaspoon of Sriracha or a pinch of red pepper flakes to the sauce mixture. It adds a wonderful “swicy” (sweet and spicy) element.
- Paleo: Use Coconut Aminos instead of soy sauce and swap the cornstarch for arrowroot powder.
How to Prepare: Step-by-Step
Making this recipe is fast, but technique matters. To ensure your chicken is juicy—never dry—follow these detailed steps.
Step 1: Prep the Chicken (The Secret to Tenderness)
Most people take the chicken breast out of the package and throw it in the pan. Don’t do this! Chicken breasts are uneven; they are thick on one end and thin on the other. This leads to the thin end drying out before the thick end is cooked.
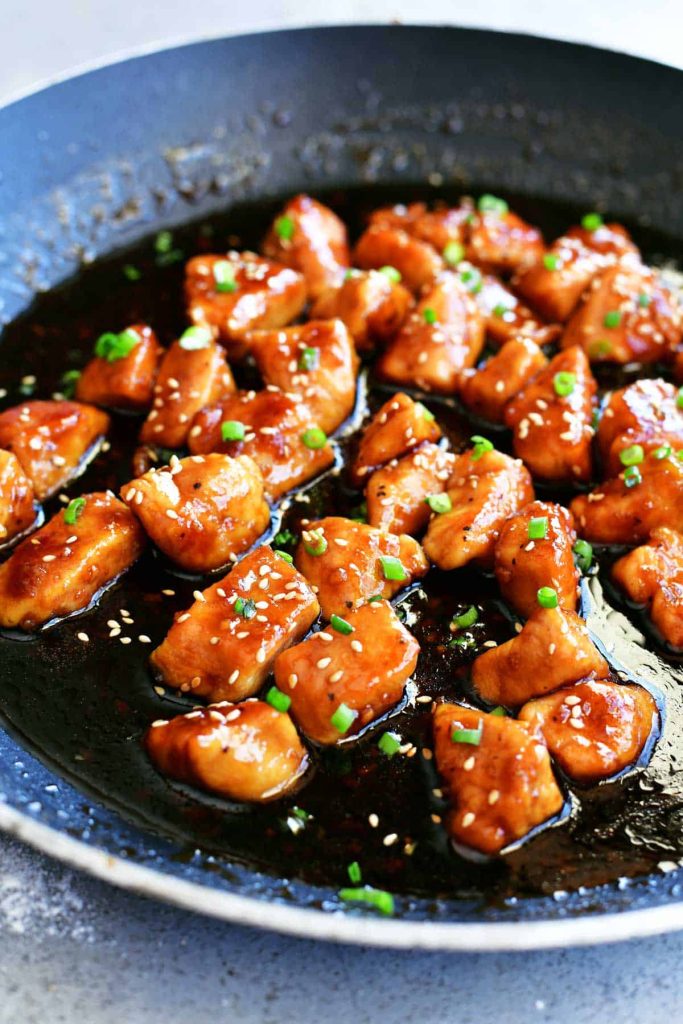
The Solution: Cut your chicken breasts into bite-sized pieces, about 1-inch cubes. Try to keep them uniform in size so they cook at the same rate.
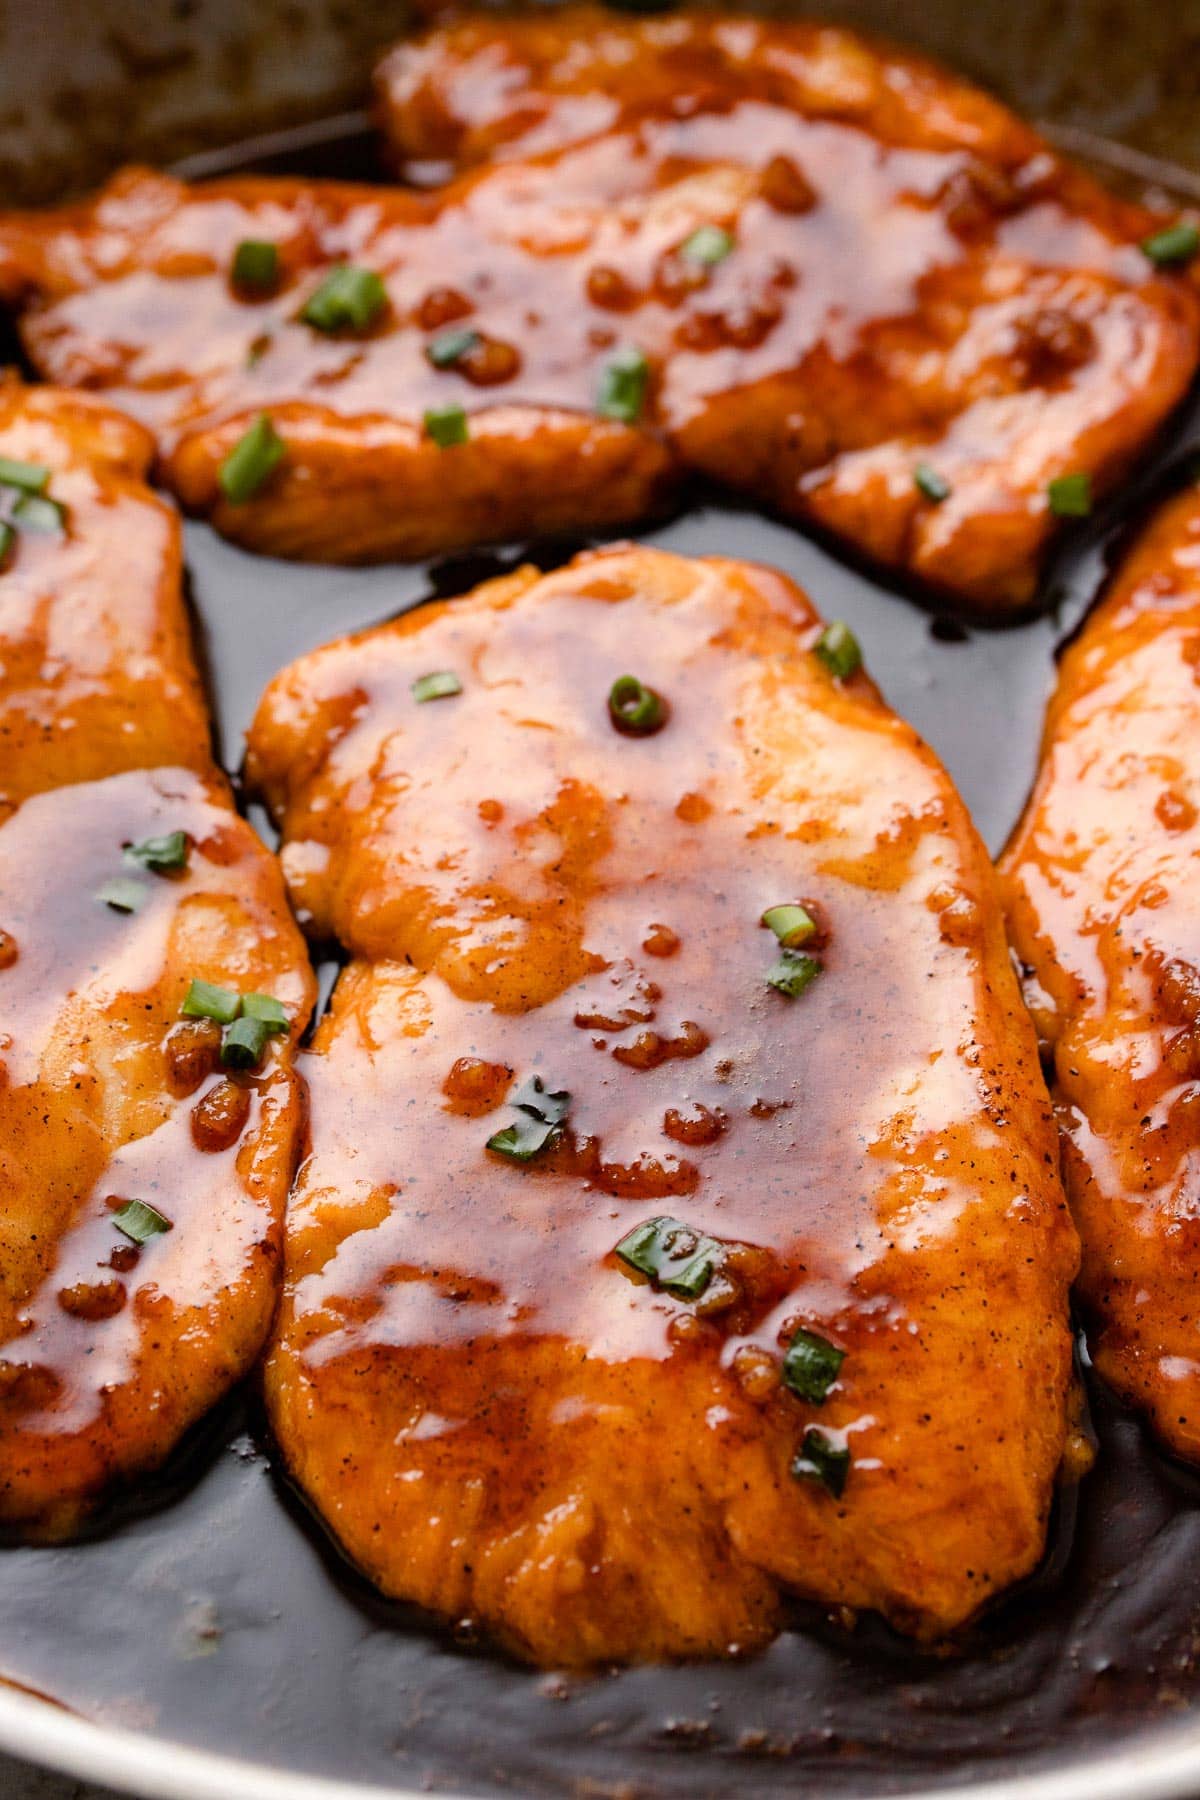
- Gina’s Tip: If you prefer whole breasts, place the chicken between two sheets of plastic wrap and pound them with a meat mallet until they are an even ½-inch thickness. This tenderizes the meat and ensures even cooking.
Step 2: Season and Coat
Pat the chicken dry with paper towels. Removing surface moisture helps the chicken brown rather than steam. Season the chicken lightly with salt and black pepper.
Next, toss the chicken cubes in a light dusting of cornstarch (about 1 tablespoon). This is a technique often used in Chinese cooking called “velveting.” It creates a barrier that seals in the juices and gives the sauce something to cling to.
Step 3: Make the Sauce
In a small bowl or jar, whisk together:
- 1/3 cup Honey
- 1/4 cup Low-Sodium Soy Sauce
- 1 tablespoon Apple Cider Vinegar
- 1 teaspoon Sesame Oil (optional, for nuttiness)
- The minced garlic
Whisk until the honey is fully dissolved. Set this aside.
Step 4: The Sear
Heat a large non-stick skillet or wok over medium-high heat. Add your oil. Once the oil is shimmering (but not smoking), add the chicken pieces in a single layer.
Do not overcrowd the pan. If you pile the chicken on top of each other, the temperature of the pan drops, and the chicken releases water and steams. You want a sear! If necessary, cook in two batches.
Let the chicken cook undisturbed for 2-3 minutes until a golden-brown crust forms. Flip and cook for another 1-2 minutes on the other side. The chicken doesn’t need to be 100% cooked through yet, as it will finish in the sauce.
Step 5: The Glaze
Pour the sauce mixture over the chicken in the skillet. Reduce the heat to medium-low.
This is where the magic happens. The sauce will bubble up. Let it simmer for 3-4 minutes. As the water evaporates, the sugars in the honey and the proteins in the soy sauce will thicken. Toss the chicken continuously so every nook and cranny gets coated.
You know it’s done when the sauce is thick enough to coat the back of a spoon and the chicken reaches an internal temperature of 165°F.
Step 6: Garnish and Serve
Remove from heat immediately—residual heat will continue to cook the chicken. Sprinkle with toasted sesame seeds and chopped green onions. Serve hot!
Cooking Methods: Beyond the Stovetop
While the stovetop is my preferred method for that sear, life happens! Here is how to adapt this recipe for other appliances.
Air Fryer Method
I love my air fryer for a slightly crispier “fried chicken” texture without the oil.
- Preheat Air Fryer to 400°F.
- Toss chicken cubes with 1 tbsp olive oil, salt, pepper, and a light dusting of cornstarch.
- Arrange in a single layer in the basket.
- Cook for 8-10 minutes, shaking the basket halfway through.
- While chicken cooks, simmer the sauce ingredients in a small saucepan on the stove until thickened (about 3-5 mins).
- Toss the cooked air-fried chicken in the thickened sauce in a bowl.
Instant Pot Method
Great for larger batches, though you lose the crispy exterior.
- Set IP to Sauté mode. Add oil and brown the chicken (do this in batches).
- Turn off Sauté. Add the sauce ingredients.
- Close lid, set valve to Sealing.
- Cook on High Pressure for 3 minutes.
- Quick Release the pressure immediately (to prevent overcooking).
- Remove chicken. Turn Sauté mode back on. Mix 1 tsp cornstarch with 1 tbsp water (slurry) and stir into the sauce to thicken it. Return chicken to pot to coat.
Slow Cooker Method
Best for shredded chicken rather than cubes.
- Place whole chicken breasts in the slow cooker.
- Whisk sauce ingredients and pour over chicken.
- Cook on Low for 3-4 hours or High for 1.5-2 hours.
- Remove chicken and shred with two forks.
- Transfer liquid to a saucepan and simmer with a cornstarch slurry to thicken, then pour back over the shredded chicken.
Oven Baked Method
The “hands-off” approach.
- Preheat oven to 400°F.
- Place chicken cubes in a baking dish.
- Pour sauce mixture over the chicken.
- Bake for 20-25 minutes.
- Important: Spoon the sauce over the chicken halfway through cooking.
- If you want sticky tops, broil for the last 2 minutes (watch carefully so the honey doesn’t burn!).
Storage & Meal Prep
This Honey Garlic Chicken is a meal prep champion. Here is how to keep it fresh and safe.
Storing Leftovers
- Refrigerator: Allow the chicken to cool completely before transferring to an airtight container. It will keep well in the fridge for 3 to 4 days.
- Freezer: You can freeze the cooked chicken in the sauce. Place in a freezer-safe bag or container for up to 3 months. Thaw overnight in the refrigerator before reheating.
Reheating Tips
The microwave is convenient, but it can make chicken rubbery if you aren’t careful.
- Microwave: Sprinkle a teaspoon of water over the chicken and cover the container loosely with a damp paper towel. This creates steam and keeps the meat moist. Heat in 30-second intervals.
- Stovetop (Best Method): Place chicken and sauce in a skillet over medium-low heat. Add a splash of water or chicken broth to loosen the sauce. Stir gently until heated through.
Meal Prep Ideas
- Bowls: Portion the chicken with ½ cup of brown rice and steamed broccoli.
- Salads: Use the cold leftover chicken on top of a crunchy Asian chopped salad with cabbage, carrots, and edamame.
- Wraps: Dice the leftovers small and roll into a whole wheat wrap with spinach and a little light mayo or Greek yogurt.
Comprehensive FAQ Section
I get asked a lot of questions about this recipe, so I’ve compiled the most common ones here to help you troubleshoot and perfect your dish.
1. Can I use chicken thighs instead of breasts?
Absolutely. In fact, chicken thighs are naturally juicier and more forgiving if you accidentally overcook them. Boneless, skinless chicken thighs work perfectly here. You might need to cook them for an extra minute or two as they have a higher fat content and take slightly longer to break down.
2. My sauce is too runny. What went wrong?
This usually happens for two reasons: either the sauce wasn’t simmered long enough, or the chicken released too much water. To fix it, remove the chicken from the pan, turn the heat up, and let the sauce reduce further. Alternatively, make a “slurry” (1 teaspoon cornstarch mixed with 1 teaspoon cold water) and stir it into the boiling sauce. It will thicken instantly.
3. My sauce is too thick and sticky!
If the sauce turns into a hard candy or is too thick to toss, you reduced it too much. Simply stir in a tablespoon of hot water or chicken broth at a time until it reaches your desired consistency.
4. Is this recipe spicy?
As written, no. It is sweet and savory. However, as mentioned in the variations, adding Sriracha, chili garlic sauce (Sambal Oelek), or red pepper flakes is a delicious way to add heat.
5. Can I marinate the chicken in the sauce beforehand?
You can, but I don’t find it necessary for flavor since the glaze is so potent. If you do marinate, do not use the leftover marinade as the sauce unless you boil it for at least 5 minutes to kill raw chicken bacteria. I recommend making a double batch of sauce: half for marinade, half for cooking.
6. What vegetables pair best with this?
This dish screams for green veggies. My favorites are:
- Steamed Broccoli (the florets catch the extra sauce!)
- Snap Peas or Snow Peas
- Baby Bok Choy
- Green Beans
- Bell Peppers (sauté them right along with the chicken)
7. Is this recipe Keto-friendly?
Strictly speaking, no, because of the honey and cornstarch. For a Keto version, substitute the honey with a sugar-free syrup (like monk fruit or allulose syrup) and use xanthan gum instead of cornstarch for thickening.
8. Why does my garlic taste bitter?
Garlic burns very quickly. If you add the garlic to the hot oil before the chicken, it will likely burn and turn bitter. I recommend adding the minced garlic to the sauce mixture, or adding it to the pan during the last minute of searing the chicken, right before you pour in the liquid.
9. Can I make this in a large batch for a party?
Yes! The oven method is best for large batches. You can use a large roasting pan. Just ensure you rotate the chicken and baste it frequently so it doesn’t dry out.
10. How do I know when the chicken is done without cutting into it?
I always recommend using an instant-read meat thermometer. It is the only way to be 100% sure. You are looking for an internal temperature of 165°F (74°C). Cutting into the chicken lets the juices run out, making it dry.
Recipe Card Summary
Here is the quick breakdown for your planning:
- Prep Time: 10 minutes
- Cook Time: 15 minutes
- Total Time: 25 minutes
- Servings: 4
Nutrition Highlight (Per Serving):
- Calories: ~280 kcal
- Protein: 26g
- Carbohydrates: 18g (mostly from honey)
- Fat: 10g
- Fiber: 0.5g
Note: Nutritional info is an estimate and varies based on the specific brands of ingredients used.
I hope you love this Honey Garlic Chicken Breast as much as my family does. It’s one of those recipes that proves eating healthy doesn’t mean sacrificing flavor.
Deep Dive: The Science of the Sauce
I want to take a moment to geek out a little bit on why this sauce works so well. Cooking is chemistry, after all!
When we mix honey (sugar) and soy sauce (amino acids) and heat them, we are encouraging the Maillard Reaction. This is a chemical reaction between amino acids and reducing sugars that gives browned food its distinctive flavor. It’s what makes a seared steak taste better than a boiled one, and it’s what gives this chicken that depth of savory flavor.
Furthermore, the emulsification process is key. Honey is thick and viscous. Soy sauce is thin and watery. By heating them together and letting them bubble, we are evaporating the water content from the soy sauce and vinegar. As the water leaves, the sugar concentration increases, creating a syrup.
The cornstarch acts as a binder. Starch granules swell when heated in liquid. This swelling traps water molecules, increasing the viscosity of the mixture. This is why the “slurry” technique is so important—if you added dry cornstarch directly to hot liquid, the outside of the powder clumps would gelatinize instantly, forming a waterproof barrier around dry powder inside (aka lumpy sauce). By mixing it with cold water first or dusting the chicken, we ensure smooth dispersion.
Tips for Buying Chicken Breast
Not all chicken is created equal. When shopping for this recipe, keep these tips in mind:
- Air-Chilled vs. Water-Chilled: In the US, most chicken is cooled in vats of cold water. The chicken absorbs this water (which you pay for by the pound!). When you cook it, that water releases, steaming your meat instead of searing it. Air-chilled chicken is cooled by cold air. It tastes more “chicken-y” and browns significantly better.
- Woody Breast Syndrome: Have you ever bitten into a chicken breast and the texture was rubbery, crunchy, or stringy? That is “woody breast.” It usually happens in very large, rapidly grown chickens. To avoid this, try to buy smaller breasts, or organic/pasture-raised chicken which tends to grow at a slower, more natural rate.
- Trimming: Even boneless skinless breasts need a little cleanup. Trim off any white gristle or large pockets of fat. This ensures every bite is tender.
Expanding Your Side Dish Game
While I listed some veggies above, let’s talk about creating a balanced plate.
Since this chicken is rich and sweet, you want sides that offer contrast.
- Texture Contrast: The chicken is soft and sticky. Pair it with something crunchy. A cucumber salad with sesame oil and vinegar is a refreshing, cold crunch that cuts through the warm, sticky sauce.
- Flavor Contrast: The sauce is sweet. Avoid sweet sides (like glazed carrots or sweet potatoes). Instead, go for earthy or bitter profiles. Roasted Brussels sprouts with a little lemon juice are perfect here.
- Carb Pairing:
- White Rice: The classic. It absorbs the sauce best.
- Brown Rice: Nuttier and higher in fiber.
- Quinoa: A protein powerhouse.
- Cauliflower Rice: For my low-carb friends. Sauté the cauliflower rice with a little garlic and ginger to mirror the flavors of the chicken.
Troubleshooting the “Smoke”
A common issue with honey-based recipes is smoke in the kitchen. Honey burns at a relatively low temperature compared to oil.
If your pan is smoking:
- Turn down the heat. You likely have the burner on High when it should be on Medium.
- Check your oil. Are you using Extra Virgin Olive Oil? It has a low smoke point. For high-heat searing, use Light Olive Oil, Canola, or Avocado Oil.
- Don’t walk away. Once the honey sauce is in the pan, it can go from caramelized to burnt carbon in about 30 seconds. Stay with the pan and keep stirring.
A Note on Sodium
I cannot stress enough the importance of Low-Sodium Soy Sauce.
If you use full-sodium soy sauce (like Kikkoman Red Label), this dish will likely be too salty to eat. A tablespoon of regular soy sauce has about 900mg of sodium. Low sodium has about 500mg. Since we are reducing the sauce (evaporating water), the salt concentrates.
If you only have regular soy sauce:
- Use half the amount of soy sauce.
- Dilute it with water or unsalted chicken stock to make up the volume.
Making It A “Bowl” Meal
One of my favorite ways to serve this for lunch is as a “Buddha Bowl.”
Layer 1: Base of spinach or mixed greens. Layer 2: scoop of brown rice or quinoa. Layer 3: The Honey Garlic Chicken. Layer 4: Matchstick carrots, sliced cucumber, shelled edamame, and half an avocado. Drizzle: Use a little extra sauce from the pan as the dressing for the whole bowl.
This gives you healthy fats, fiber, greens, and protein all in one go.
Final Thoughts on “Healthy” Eating
I started Skinnytaste because I wanted to lose weight but I refused to eat bland, boiled food. Recipes like this Honey Garlic Chicken are the cornerstone of my philosophy.
It’s not about deprivation. It’s about modification.
By controlling the amount of oil, using lean meat, and making our own sauce (instead of a bottled one loaded with high fructose corn syrup and preservatives), we create a meal that nourishes the body and satisfies the soul.