Hi everyone! If there is one question I get asked more than any other, how do I bake chicken breast without it tasting like cardboard?”
We have all been there.
You’re trying to eat healthy.
You buy the lean boneless, skinless breasts.
You pop them in the oven.
And twenty minutes later, you are chewing on something dry, rubbery, and completely uninspiring.
It doesn’t have to be this way!
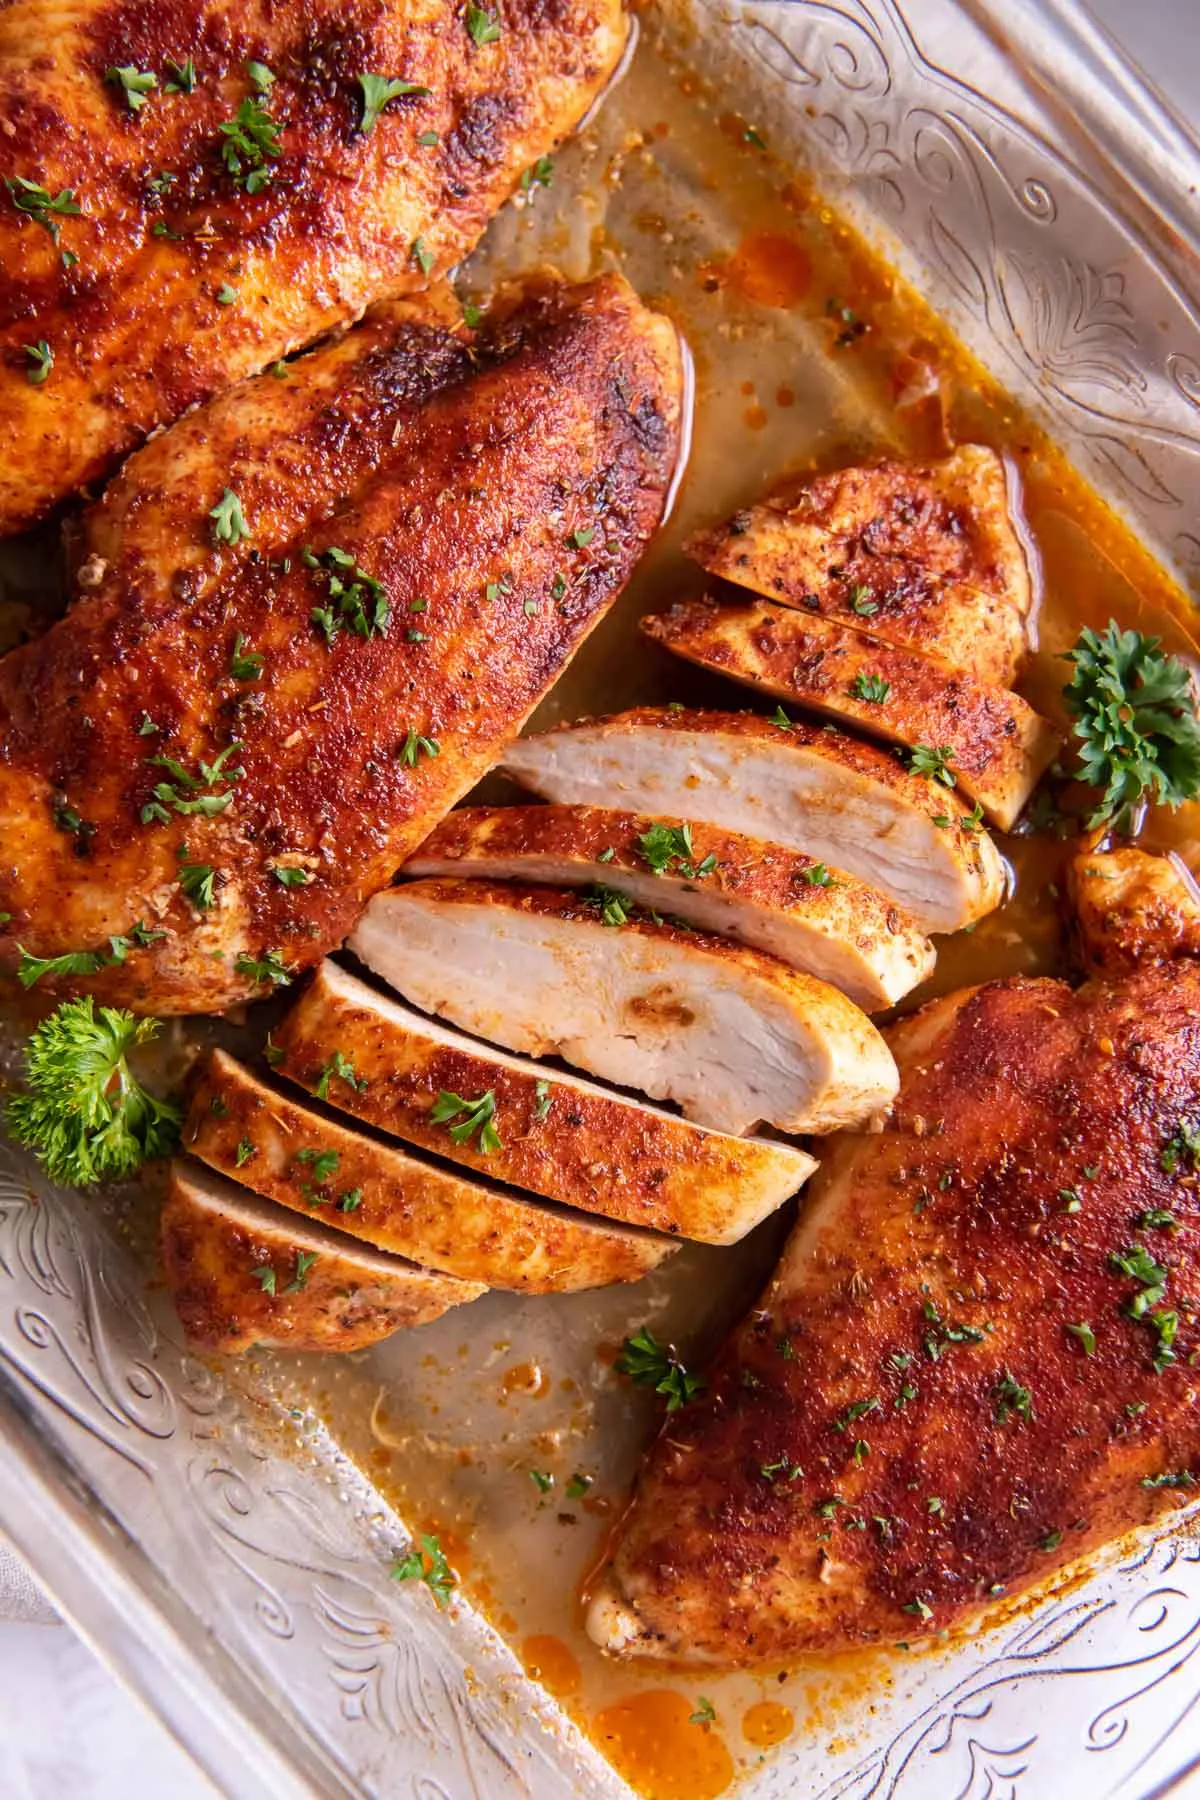
Over the years, through writing hundreds of recipes for Skinnytaste, I have perfected the art of the juicy, tender, flavor-packed oven-baked chicken breast.
This isn’t just a recipe; it is a master class.
Whether you are meal prepping for the week, throwing together a quick salad, or feeding a hungry family on a Tuesday night, mastering the oven-baked chicken breast is the most valuable skill you can have in your healthy cooking arsenal.
Let’s get into the kitchen and change the way you look at white meat chicken forever.
Why You’ll Love This Recipe
There is a reason chicken breast is the most popular protein in America, but preparing it correctly makes all the difference. Here is why this specific method is going to become your new go-to:
- Zero “Rubber” Factor: By using a specific temperature and prep method, we lock in the juices so the meat stays tender.
- Macro-Friendly: This is pure, lean protein. It is low in fat, zero carbs, and perfect for Weight Watchers, Keto, Whole30, or just general healthy eating.
- Incredible Versatility: Once you master the base technique, you can change the flavor profile with simple spice swaps—from Italian to Mexican to Asian-inspired.
- Meal Prep Gold: This chicken stores beautifully. Make a big batch on Sunday, and you have protein for salads, wraps, and bowls all week long.
- Budget Conscious: Buying chicken breasts in bulk and baking them yourself is significantly cheaper (and healthier) than buying pre-cooked deli strips or rotisserie chickens.
- No Messy Stovetop: Baking means no oil splattering all over your stove. It’s a hands-off method that lets you prep the rest of your dinner while the oven does the work.
Ingredients Required
To get the best results, you need to understand why we are using specific ingredients. While the list looks simple, the quality and preparation of these ingredients determine the final texture.
The Essentials
- Boneless, Skinless Chicken Breasts:
- Why: This is the leanest cut of the chicken.
- My Tip: Look for “Air-Chilled” chicken if you can find it. Standard chicken is often cooled in water vats, meaning the meat absorbs excess water (which steams out during cooking, making it soggy). Air-chilled chicken has a more concentrated flavor and better texture. Try to pick breasts that are roughly the same size so they cook evenly.
- Extra Virgin Olive Oil (or Avocado Oil):
- Why: Even though we want this to be healthy, chicken breast has very little fat. You need a small amount of healthy fat to coat the outside. This helps conduct heat, encourages browning, and keeps the herbs stuck to the meat.
- My Tip: I love a good spray oil (like an EVO mister) to coat the chicken evenly without using excessive calories.
- Kosher Salt:
- Why: This is non-negotiable. Salt does more than flavor; it denatures the proteins, allowing them to hold onto moisture.
- My Tip: Diamond Crystal Kosher Salt is my favorite because it’s less salty by volume than table salt, making it harder to over-salt your food.
- Black Pepper:
- Why: Freshly cracked black pepper adds that necessary bite and heat.
- Garlic Powder & Onion Powder:
- Why: These aromatics provide a savory depth that fresh garlic can sometimes miss in the oven (fresh garlic can burn at high temps). They coat the meat evenly.
- Dried Oregano or Italian Seasoning:
- Why: Dried herbs stand up well to the dry heat of the oven. They release their oils as they bake, perfuming the meat.
- Paprika (Sweet or Smoked):
- Why: This isn’t just for flavor; it helps give the chicken a beautiful golden-red color so it doesn’t look pale and unappetizing.
Variations & Substitutions
One of my favorite things about this method is how easily you can swap ingredients to suit your dietary needs or cravings.
- The “Taco Night” Twist: Swap the oregano and paprika for Cumin, Chili Powder, and a squeeze of lime before baking. Perfect for fajita bowls.
- The “Greek” Style: Use dried oregano, lemon zest, and a splash of red wine vinegar in the oil rub. Serve with tzatziki.
- The “Blackened” Kick: Increase the paprika (use smoked!), add cayenne pepper, dried thyme, and extra garlic powder.
- Vegan/Vegetarian: Obviously, this is a chicken recipe! But, you can actually use this same seasoning blend on thick-cut cauliflower steaks or firm tofu slabs—just adjust cooking times.
- Gluten-Free: The base recipe is naturally gluten-free. Just ensure your spice blends (if using pre-mixed) don’t contain anti-caking agents derived from wheat.
How to Prepare
This is the most important section of this post. Baking chicken is science. If you follow these steps exactly, I promise you will have the best chicken of your life.
Step 1: The Setup
Preheat your oven to 400°F (200°C). I have tested chicken at 350°F, 375°F, and 425°F. I have found that 400°F is the sweet spot. It is hot enough to sear the outside slightly and cook the meat quickly (which retains moisture), but not so hot that the outside dries out before the center is safe to eat.
Line a large baking sheet with parchment paper or foil. If using foil, give it a light spray with oil to prevent sticking. I personally prefer parchment paper for easier cleanup and zero sticking.
Step 2: The Secret Technique (Pounding)
This is the step most people skip, and it is the #1 reason for dry chicken. Chicken breasts are naturally uneven—thick at one end and tapered at the other. If you bake them as-is, the thin end will be dry as leather by the time the thick end is cooked through.
Here is what you do:
- Place the chicken breasts on a cutting board.
- Cover them with a piece of plastic wrap or place them inside a large zip-top bag (leave it slightly open to let air escape).
- Using the flat side of a meat mallet (or a heavy rolling pin, or even the bottom of a heavy skillet), gently pound the thickest part of the chicken.
- Your goal is uniform thickness, ideally about ¾-inch thick all the way across.
- Note: You aren’t trying to flatten it into a pancake; you just want it even. This ensures the entire piece of meat finishes cooking at the exact same moment.
Step 3: The “Dry Brine” (Optional but Recommended)
If you have time (even just 15 minutes), salt your pounded chicken and let it sit on the counter. This is called “dry brining.” The salt draws moisture out, dissolves into a brine, and is then reabsorbed into the meat, seasoning it from the inside out. If you are in a rush, just season and bake—it will still be delicious!
Step 4: Seasoning
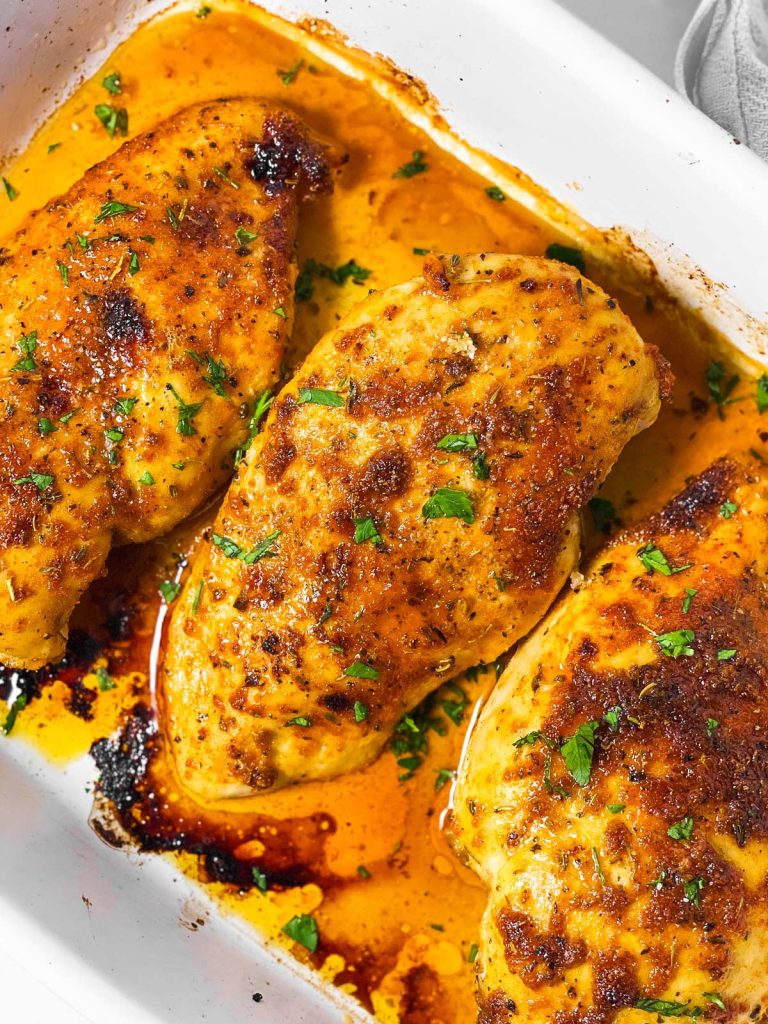
Drizzle your olive oil over the chicken. Use your hands to rub the oil over every nook and cranny. This creates a seal. In a small bowl, mix your salt, pepper, garlic powder, onion powder, paprika, and dried herbs. Sprinkle this mixture generously over both sides of the chicken. Don’t be shy! Chicken can handle a lot of seasoning. Press the spices into the meat with your hand so they stick.
Step 5: Baking
Place the chicken on your prepared baking sheet. Leave a little space between each breast. Do not overcrowd the pan. If the chicken pieces are touching, they will steam each other instead of roasting, and you will lose that nice texture.
Bake in the center of the oven. For standard pounded breasts (¾-inch thick), bake for 18 to 22 minutes. If your breasts are smaller (around 6oz), check them at 15 minutes. If they are massive (10oz+), they may need 25 minutes.
Step 6: The Temperature Check
The only way to be 100% sure your chicken is safe and juicy is to use an instant-read meat thermometer. You want to pull the chicken out of the oven when it hits 160°F to 162°F. Wait, isn’t the safe temperature 165°F? Yes! But the temperature will continue to rise about 5 degrees after you take it out of the oven (carryover cooking). If you wait until it hits 165°F in the oven, it will rise to 170°F on the counter, and it will be dry. Pulling it at 160°F ensures it hits the perfect safety zone while resting.
Step 7: The Rest
Do not skip this. When you take the chicken out, transfer it to a clean plate or cutting board and let it rest for 5 to 10 minutes before slicing. If you cut into it immediately, all those hot juices will run out onto the cutting board, leaving you with dry meat. Resting allows the fibers to relax and reabsorb the juices.
Cooking Methods
While this post is dedicated to the classic Oven Method, I know we all love our kitchen gadgets! Here is how to adapt this exact recipe for your other favorite appliances.
Air Fryer Method
I love the Air Fryer for when I’m just making 1 or 2 breasts. It’s faster and gives a slightly crispier “crust.”
- Preheat Air Fryer to 375°F.
- Prep and season the chicken exactly as described above.
- Place in the basket (do not overlap).
- Cook for 10 to 12 minutes, flipping halfway through.
- Check internal temp for 160°F.
Instant Pot Method
This is best if you want shredded chicken for tacos or soups, rather than a sliceable breast.
- Add 1 cup of chicken broth or water to the Instant Pot insert.
- Place the trivet inside and place seasoned chicken on the trivet.
- Seal the lid. Set to High Pressure for 8 to 10 minutes (depending on thickness).
- Let the pressure release naturally for 5 minutes, then quick release.
- Remove and shred or slice.
Slow Cooker Method
This is great for “set it and forget it” meals, but note that the texture will be very soft, more like poached chicken.
- Place seasoned chicken at the bottom of the slow cooker.
- Add roughly ½ cup of broth or salsa (liquid helps here).
- Cook on LOW for 3-4 hours or HIGH for 1.5-2 hours.
- Be careful not to overcook, as slow cooker chicken can surprisingly become dry and stringy if left too long.
Stovetop (Pan Seared)
If you don’t want to turn on the oven in the summer:
- Heat 1 tbsp oil in a large skillet over medium-high heat.
- Add pounded chicken. Cook for 4-5 minutes undisturbed to get a golden crust.
- Flip, reduce heat to medium, and cook for another 4-6 minutes covered, until it reaches 160°F.
Storage & Meal Prep
This recipe is the holy grail of meal prep. I almost always make a double batch on Sundays so I have lunch ready for myself and my husband for the next few days.
Refrigerator: Store leftover cooked chicken in an airtight glass container. It will stay fresh for 3 to 4 days. Pro Tip: Store the chicken whole if possible, and slice it right before you eat it. This keeps it juicier than storing it pre-sliced.
Freezer: You can freeze cooked chicken breasts!
- Let them cool completely.
- Wrap each breast individually in plastic wrap or foil.
- Place them in a freezer-safe heavy-duty bag (like a Stasher bag or Ziploc).
- Freeze for up to 3 months.
- Thaw overnight in the fridge before reheating.
Reheating: This is where people ruin their meal prep!
- Microwave: Place chicken on a plate, sprinkle with a teaspoon of water or broth, and cover with a damp paper towel. Heat in 30-second intervals. The steam prevents drying.
- Oven: Place chicken in a baking dish, add a splash of broth, cover tightly with foil, and warm at 350°F for 10-15 minutes.
- Cold: Honestly? This chicken is delicious cold! I love slicing it cold right onto a salad or into a wrap.
Comprehensive FAQ Section
1. Why does white stuff come out of my chicken when I bake it? That white substance is called albumin. It is a soluble protein in the muscle fibers. When chicken cooks too fast or gets too hot, the fibers contract and squeeze out the moisture, which carries this protein with it. While it is totally safe to eat, it usually means you might be overcooking your chicken slightly. Pounding the chicken and not setting the oven temperature too high (staying at 400°F) helps minimize this.
2. Should I wash my chicken before cooking? No! Please don’t wash your chicken. The USDA advises against this because washing raw poultry spreads bacteria (like salmonella) all over your sink, countertops, and nearby dishes via splashing water droplets. The heat of the oven will kill any bacteria on the chicken. Just pat it dry with a paper towel if it feels overly wet.
3. Can I bake frozen chicken breasts? Technically yes, but I do not recommend it for this “classic” method. It takes about 50% longer to cook, and the texture is often uneven—the outside gets rubbery before the inside thaws and cooks. For best results, thaw your chicken in the fridge overnight. If you must cook from frozen, the Instant Pot is a safer bet than the oven.
4. How do I know if the chicken is done without a thermometer? While a thermometer is the only foolproof way, you can use the “juice test.” Poke the thickest part of the meat with a knife or skewer. If the juices run clear, it is likely done. If they are pink, it needs more time. Also, the meat should feel firm to the touch, not squishy.
5. Why is my chicken tough even though I didn’t overcook it? This could be the quality of the meat. Sometimes, large, commercially raised chickens suffer from “woody breast” syndrome, where the muscle fibers are tough and stringy regardless of how you cook them. This is why I recommend buying smaller breasts (organic or air-chilled often helps) rather than the massive jumbo ones.
6. Can I use a glass baking dish instead of a sheet pan? Yes, you can. However, glass is an insulator. It takes longer to heat up and holds heat longer. This might result in the chicken steaming in its own juices rather than roasting. If you use a glass dish like a Pyrex, you might not get that nice golden exterior, but the meat will still be cooked.
7. Is it okay if the chicken is slightly pink inside? Color is actually not the best indicator of doneness. According to the USDA, fully cooked poultry can sometimes still show a pinkish tinge in the meat and juices due to hemoglobin in the tissues. If your thermometer says 165°F (after resting), it is safe to eat, even if it looks slightly rosy.
8. Can I use this method for chicken thighs? Absolutely! Boneless, skinless chicken thighs are delicious. Because they have more fat and connective tissue, they are more forgiving and harder to dry out. You usually need to bake thighs a little longer—about 20 to 25 minutes at 400°F—to render the fat properly.
9. How do I slice the chicken properly? Always slice against the grain. Look at the direction the muscle fibers run, and cut perpendicular to them. This shortens the fibers, making each bite more tender and easier to chew.
10. Is this recipe Weight Watchers friendly? Yes! This is one of the most WW-friendly foods in existence. On most plans, boneless skinless chicken breast is a Zero Point food. You only need to count the oil used. Since we use about 1 tablespoon for 4 breasts, the points per serving are negligible (usually 1 point or less depending on your specific plan).
Recipe Card Summary
Yields: 4 Servings Prep Time: 10 mins Cook Time: 20 mins Resting Time: 5 mins Total Time: 35 mins
Nutrition Highlight (Per Serving)
- Calories: 185 kcal
- Carbohydrates: 1g
- Protein: 26g
- Fat: 8g
- Fiber: 0.5g
Ingredients
- 4 (6-8 oz each) boneless, skinless chicken breasts
- 1 tbsp extra virgin olive oil (or avocado oil)
- 1 tsp kosher salt
- ½ tsp freshly ground black pepper
- ½ tsp garlic powder
- ½ tsp onion powder
- ½ tsp dried oregano
- ½ tsp paprika (sweet or smoked)
Instructions
- Preheat & Prep: Preheat oven to 400°F. Line a baking sheet with parchment paper.
- Pound: Place chicken breasts under plastic wrap and pound to an even ¾-inch thickness.
- Season: Drizzle chicken with oil, rubbing to coat. Mix spices in a small bowl and sprinkle evenly over both sides of the chicken.
- Bake: Arrange on the baking sheet without touching. Bake for 18-22 minutes, or until internal temperature reaches 160°F.
- Rest: Remove from oven and let rest on a plate for 5-10 minutes before slicing.
There you have it! The absolute best way to prepare chicken breast. I hope this guide helps you feel more confident in the kitchen.
If you try this method, please leave a comment below or tag me on Instagram—I love seeing your creations!