Let’s be honest for a second.
Chicken breast has a bad reputation.
It’s often dry. It can be rubbery. Sometimes it’s just plain boring.
For years, I struggled to get that perfect, juicy restaurant-quality chicken at home.
I would overcook it out of fear of undercooked meat, leaving my family with something that tasted like cardboard.
But, guys, I have finally cracked the code.
After testing dozens of methods, temperatures, and marinades, I am sharing my absolute holy grail method.
This is the only way I bake chicken now.
It’s simple, it’s healthy, and it guarantees juicy results every single time.
Whether you are meal prepping for the week or looking for a quick 20-minute dinner, this recipe is going to change your life.
Let’s get cooking!
Why You’ll Love This Recipe
There is a reason this baked chicken breast is a staple in my house. It checks every single box for a healthy, manageable lifestyle. Here is why I know you are going to love it:
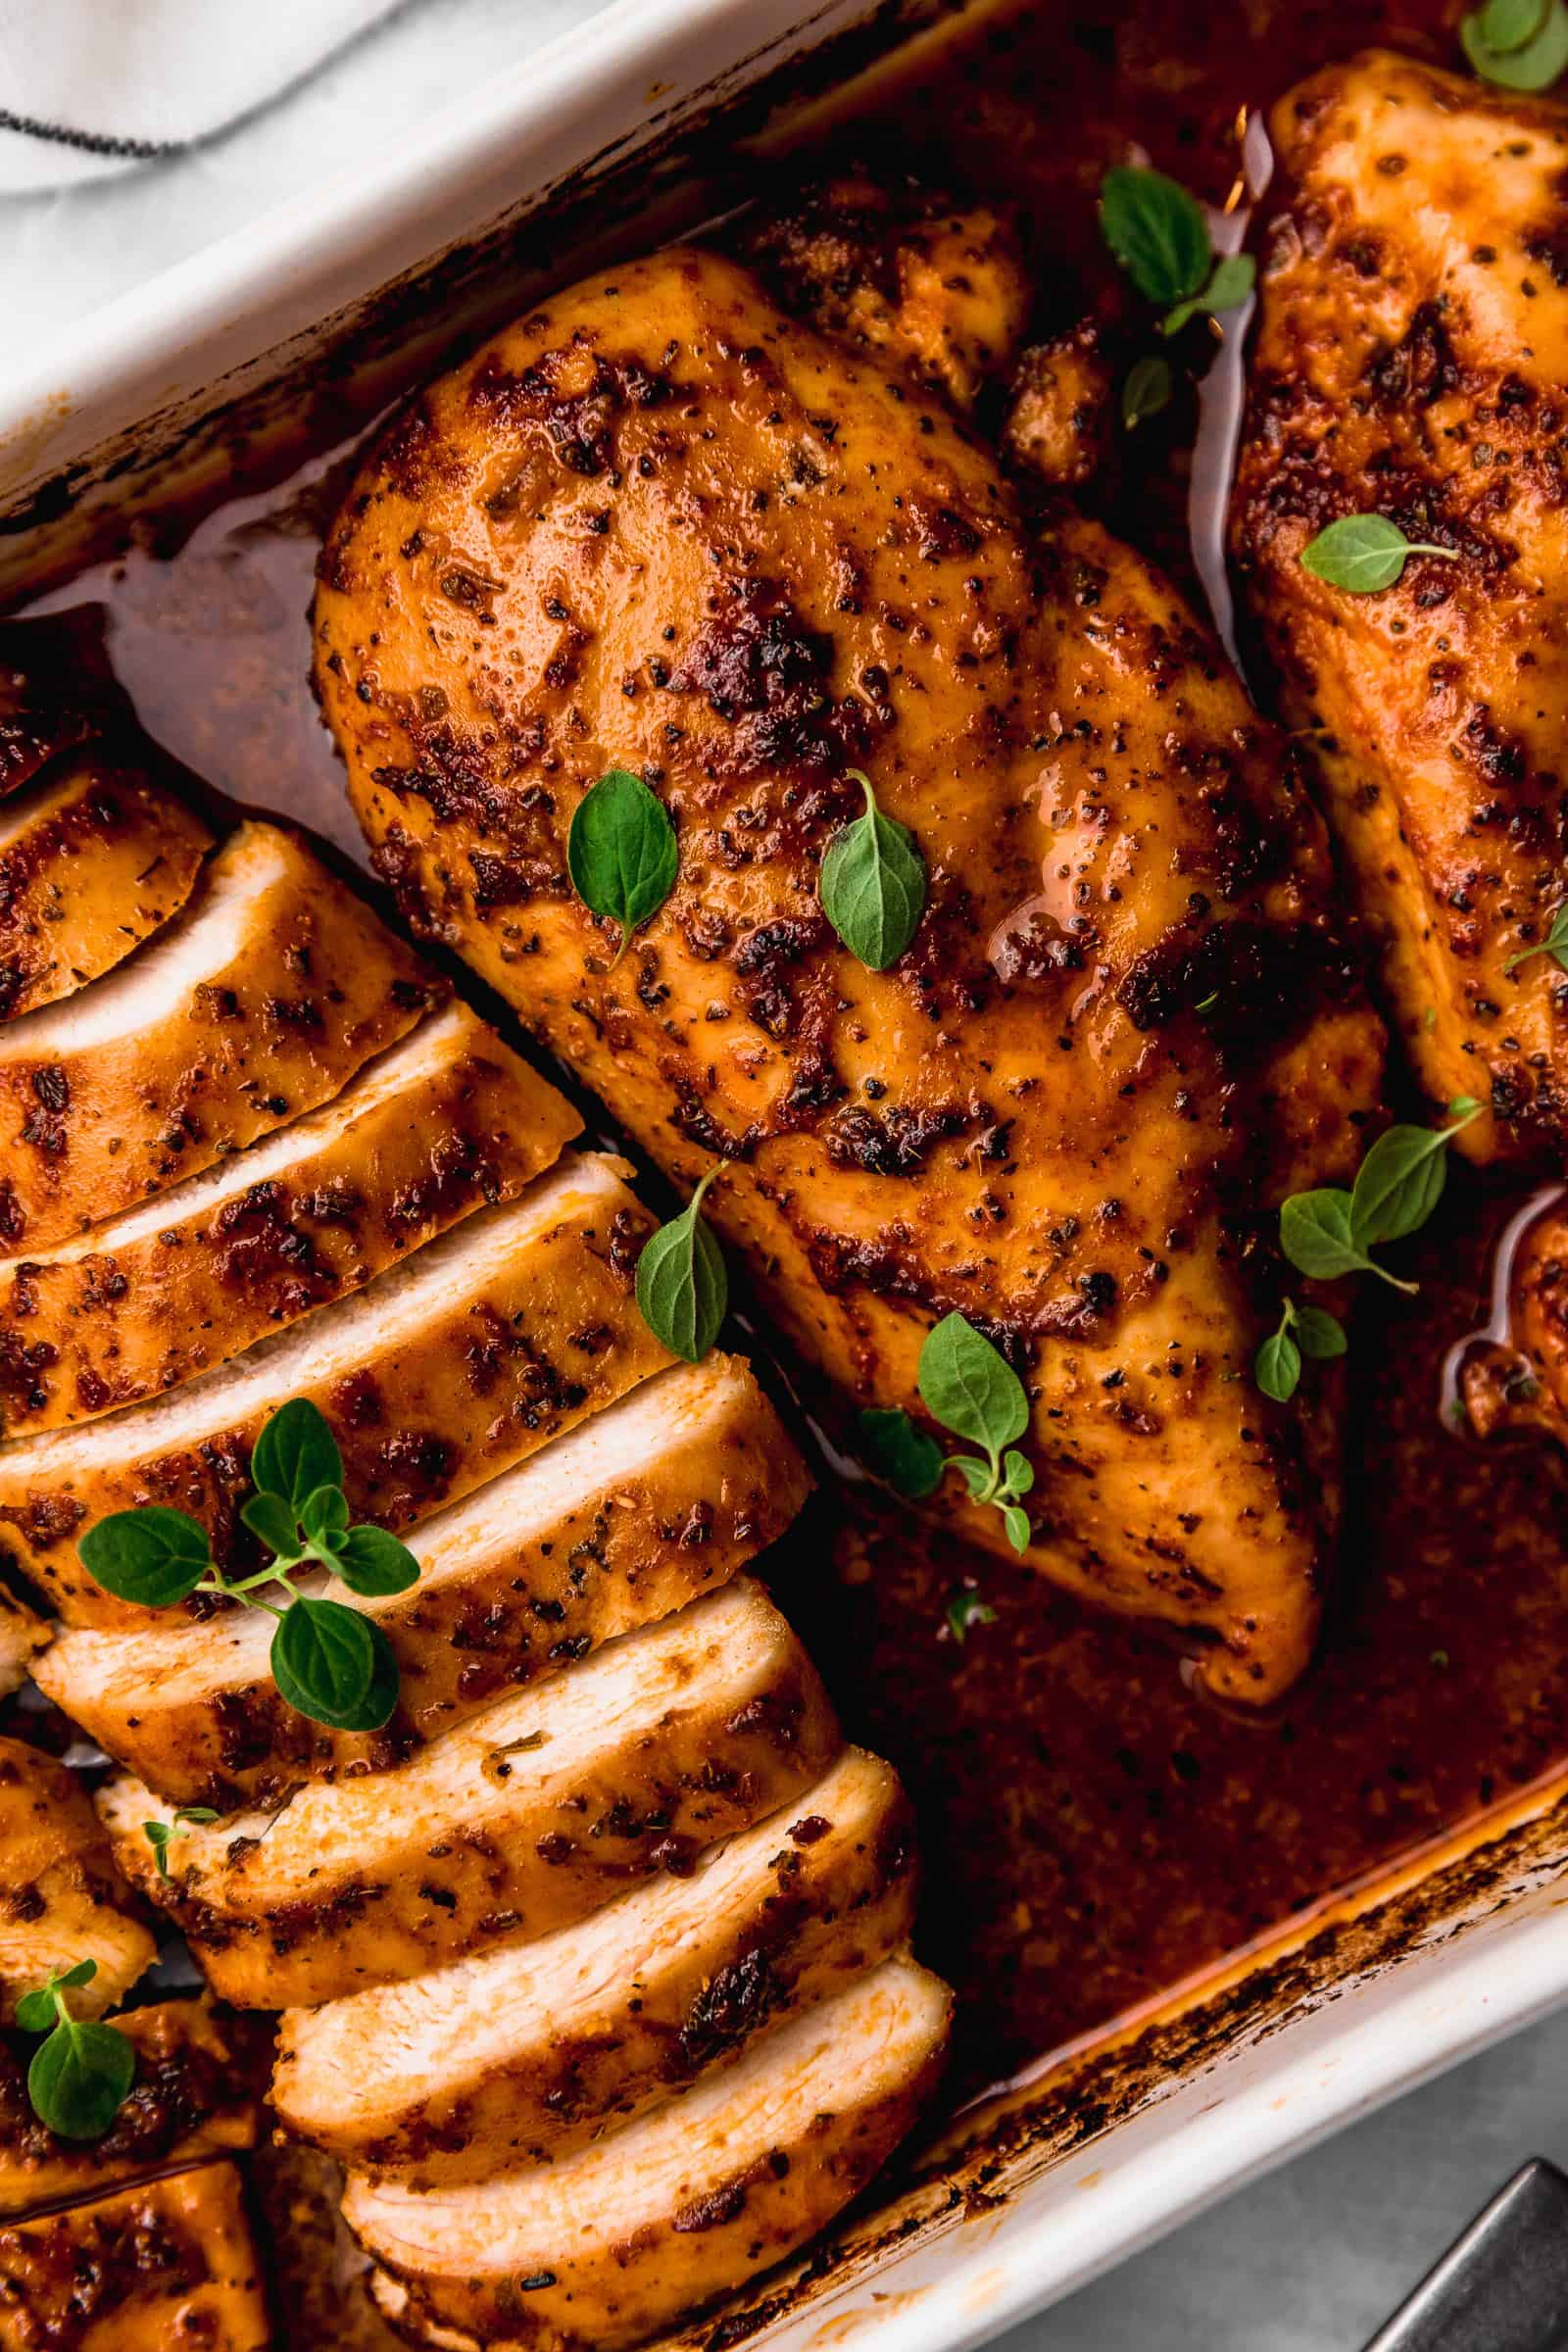
- No More Dry Meat: The number one benefit here is the texture. By using a specific high-heat method and a simple brine trick, we lock in moisture so the chicken literally melts in your mouth.
- Insanely Versatile: This is a blank canvas. While I’m sharing my favorite savory spice blend, you can use this method for everything from Taco Tuesday to Italian night just by swapping a few spices.
- Meal Prep Friendly: This is the ultimate “cook once, eat twice” protein. I usually make a double batch on Sunday. It stays juicy in the fridge for days and is perfect for tossing into salads, wraps, or grain bowls for lunch.
- Macro-Friendly & Low Calorie: If you follow Weight Watchers (WW) or count macros, boneless skinless chicken breast is the gold standard for lean protein. It fills you up without weighing you down.
- Pantry Staples Only: You don’t need to run to a specialty grocery store. You likely have the oil, salt, and spices in your cabinet right now.
- Quick Cleanup: By lining your baking sheet with parchment paper or foil, cleanup takes less than 30 seconds. As a busy mom, this is a huge win for me.
Ingredients Required
The beauty of this recipe lies in its simplicity. However, because we are using so few ingredients, the quality and the technique matter. Here is exactly what you need and, more importantly, why you need it.
The Essentials
- Boneless, Skinless Chicken Breasts:
- Why: This is our lean protein star.
- Tip: Try to buy organic or air-chilled chicken if your budget allows. Air-chilled chicken doesn’t release as much water during cooking, which means better browning and flavor. Also, look for breasts that are relatively similar in size so they cook evenly.
- Olive Oil:
- Why: You need a little fat to conduct heat and help the seasonings stick. It also helps keep the outside of the chicken from drying out in the oven.
- Tip: I use extra virgin olive oil for the flavor. If you are strictly watching calories, you can use an olive oil spray, but a teaspoon of real oil goes a long way for satiety.
- Kosher Salt:
- Why: Salt is not just for flavor; it helps break down the protein structures to retain moisture.
- Tip: I always cook with Diamond Crystal Kosher Salt. If you are using table salt, use half the amount listed, as table salt is much saltier by volume.
- Black Pepper:
- Why: Freshly cracked black pepper adds a subtle heat and bite that cuts through the richness of the oil.
- Garlic Powder & Onion Powder:
- Why: While I love fresh garlic, it burns easily at the high temperatures we are using today. Granulated garlic and onion powder provide a savory, umami depth without the risk of bitter, burnt bits.
- Dried Oregano or Italian Seasoning:
- Why: This adds an herbaceous, earthy note that makes the kitchen smell amazing.
- Tip: Rub the dried herbs between your palms before sprinkling them on to release their natural oils.
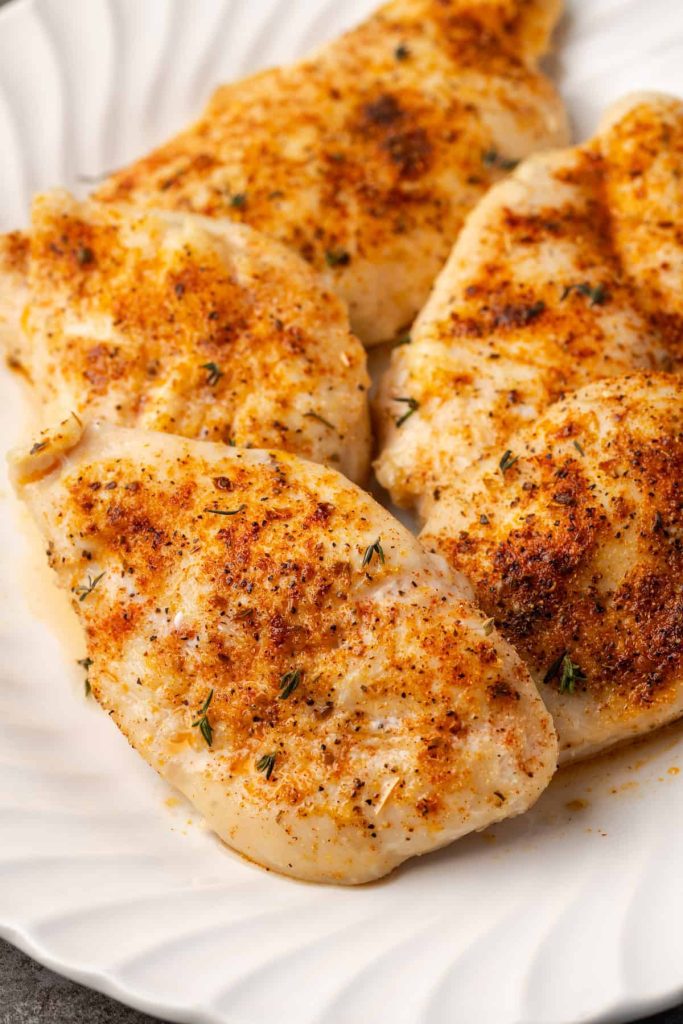
- Smoked Paprika:
- Why: This is my secret weapon. It gives the chicken a beautiful golden-red color and a subtle smoky flavor that mimics a grill, even in the middle of winter.
Variations & Substitutions
One of the best things about cooking is making a recipe your own. Here are some ways to switch it up based on your dietary needs or cravings:
- The “Taco Night” Variation: Swap the oregano and paprika for cumin, chili powder, and a squeeze of lime juice before baking. Perfect for fajitas.
- The “Lemon Garlic” Variation: Use lemon pepper seasoning and add slices of fresh lemon on top of the chicken while it bakes. The roasted lemon juice creates a built-in sauce.
- Gluten-Free: This recipe is naturally gluten-free! Just double-check your spice blends if you are using a pre-mixed packet to ensure no anti-caking agents contain gluten.
- Dairy-Free / Paleo / Whole30: This recipe is compliant with all of these diets as written.
- Vegan Option: Obviously, you can’t use chicken! However, you can use this exact same marinade on thick slabs of tofu or cauliflower steaks. Adjust cooking time to about 25-30 minutes.
How to Prepare
Okay, this is the most important part of the post. I am going to walk you through the step-by-step process. Don’t skip the prep work—it makes the difference between “meh” chicken and “wow” chicken.
Step 1: The Brine (Optional but Recommended)
If you have an extra 15 minutes, brine your chicken. Simply fill a bowl with lukewarm water and stir in a tablespoon of kosher salt until dissolved. Place your chicken breasts in the water and let them sit for 15 to 20 minutes.
- Why? This process forces water and salt into the muscle cells via osmosis. It guarantees the chicken stays juicy even if you accidentally overcook it by a minute or two.
- Note: If you brine, rinse the chicken and pat it very dry before seasoning, and go easy on the added salt later.
Step 2: Pound it Even
This is the step most people skip, and it is the number one cause of dry chicken. Chicken breasts are naturally uneven—thick on one end and thin on the other. If you bake them as-is, the thin end dries out like leather before the thick end is safe to eat.
- Place the chicken on a cutting board and cover with plastic wrap.
- Use a meat mallet (or a heavy rolling pin) to pound the thickest part of the chicken until the breast is an even thickness—aim for about ¾-inch thick.
- This ensures the entire piece of meat cooks at the exact same rate.
Step 3: Season Generously
Preheat your oven to 450°F (230°C). Yes, that is hot! We want a high heat to sear the outside quickly while keeping the inside moist. Low and slow is for ribs; high and fast is for lean chicken breast.
- Place your chicken in a large baking dish or on a rimmed baking sheet lined with parchment paper.
- Drizzle the olive oil over both sides.
- In a small small bowl, mix your salt, pepper, garlic powder, onion powder, oregano, and paprika.
- Rub the seasoning blend all over the chicken. Use your hands! Massage it in to ensure every bite is flavorful.
Step 4: Bake to Perfection
Place the baking sheet in the oven.
- Bake for 15 to 18 minutes.
- The time will vary slightly depending on the size of your breasts. Since we pounded them to an even thickness, they shouldn’t take longer than 18 minutes.
Step 5: The Rest (Crucial!)
Remove the chicken from the oven. Do not cut into it immediately. Transfer the chicken to a plate and loosely tent it with foil. Let it rest for at least 5 to 10 minutes.
- Why? During cooking, the juices migrate to the center of the meat. If you cut it right away, those juices run out onto the cutting board. Resting allows the juices to redistribute throughout the meat, keeping it tender.
Cooking Methods: Beyond the Oven
While the oven method is my go-to for standard dinner prep, I know we all love our kitchen gadgets. Here is how to adapt this recipe for other appliances.
Air Fryer Method
I am obsessed with my Air Fryer. It gives the chicken a slightly crispier “crust” than the oven.
- Preheat Air Fryer to 375°F.
- Prepare the chicken exactly as described above (pounding is essential here too).
- Spray the basket with oil.
- Cook for 10–12 minutes, flipping halfway through.
- Check internal temp; remove when it hits 160°F (it will rise to 165°F while resting).
Instant Pot (Pressure Cooker)
This method is best if you want shredded chicken for tacos or soups, as it won’t have a crust.
- Add 1 cup of chicken broth or water to the Instant Pot.
- Place the trivet inside and place seasoned chicken on the trivet.
- Seal the lid. Set to High Pressure for 8-10 minutes (depending on thickness).
- Quick release the pressure.
- Remove and shred with two forks.
Slow Cooker (Crockpot)
This is the “set it and forget it” method, ideal for days when you are out of the house.
- Place seasoned chicken at the bottom of the slow cooker.
- Add ½ cup of broth or salsa (salsa makes it incredibly tender!).
- Cover and cook on Low for 3-4 hours or High for 1.5-2 hours.
- Be careful not to overcook; lean breasts can get stringy in a slow cooker if left too long.
Stovetop (Pan-Seared)
If you want that golden-brown crust but don’t want to heat up the house with the oven.
- Heat 1 tbsp oil in a skillet over medium-high heat.
- Add chicken (do not crowd the pan).
- Cook for 5-6 minutes undisturbed to get a sear.
- Flip and cook for another 5-6 minutes.
- Cover the pan with a lid for the last 2 minutes to steam the center to perfection.
Storage & Meal Preparation
If you are like me, you are probably cooking this with the intention of having leftovers. Here is how to keep your chicken tasting fresh, not funky.
Storing Leftovers
- Cool Completely: Never put hot chicken directly into a plastic container. It creates condensation, which leads to soggy meat and faster spoilage. Let it cool on the counter for 30 minutes.
- Refrigerate: Store in an airtight container for 3 to 4 days.
- Freeze: This freezes beautifully! Slice the cooked chicken or leave it whole. Wrap tightly in plastic wrap and then place in a freezer-safe Ziploc bag. It lasts for up to 3 months. Thaw overnight in the fridge before using.
Reheating Tips
The microwave is the enemy of chicken breast. It nukes the moisture right out of it.
- Best Way: Reheat in a skillet over low heat with a splash of water or chicken broth. Cover with a lid to steam it until warm.
- Microwave Hack: If you must microwave, place a damp paper towel over the chicken and heat in 30-second intervals at 50% power. This helps create a steam environment.
“Cook Once, Eat Twice” Ideas
- Day 1: Serve warm with roasted broccoli and sweet potatoes.
- Day 2: Cube cold chicken and mix with Greek yogurt, celery, and grapes for a healthy chicken salad.
- Day 3: Slice thin and toss into a Caesar salad or a whole wheat wrap with hummus.
Comprehensive FAQ Section
I get asked a lot of questions about chicken, and I want to make sure you have all the answers in one place.
1. How do I know when the chicken is done without cutting it? The only accurate way is to use a digital meat thermometer. Insert the probe into the thickest part of the meat. You are looking for 165°F (74°C). Pro Tip: I actually pull my chicken out at 160°F. During the 5-10 minute resting period, the residual heat carries the temperature up to 165°F. This prevents overcooking.
2. My chicken always releases a white goo. What is that? That is albumin! It’s a soluble protein in the muscle fibers. When you cook chicken too fast or too long, the fibers contract and squeeze this protein out. It coagulates and turns white. It is perfectly safe to eat, but if you want to avoid it, try brining your chicken and not overcooking it.
3. Can I bake chicken and vegetables on the same pan? Yes! This is a classic sheet pan meal. However, chicken cooks faster than dense veggies like potatoes or carrots. I recommend cutting your veggies small so they roast quickly, or starting the veggies in the oven for 15 minutes before adding the chicken to the pan. Asparagus, zucchini, and bell peppers usually cook at the same rate as the chicken.
4. Should I wash my chicken before cooking? No! The CDC advises against washing raw poultry. Washing it splashes bacteria (like Salmonella) onto your sink, countertops, and clothes. The heat of the oven will kill any bacteria on the meat. Just pat it dry with paper towels to remove excess moisture.
5. Why is my chicken rubbery? Rubbery chicken is usually a sign of “woody breast” syndrome (a quality issue with modern commercial chickens) or severe overcooking. To avoid woody breast, look for smaller breasts (organic usually helps) and check the meat—if it feels hard to the touch raw, it will be rubbery cooked.
6. Is it safe if the chicken is slightly pink inside? Color is not always a reliable indicator of doneness. Smoked paprika can sometimes leave a pink hue, and meat near the bone (if using bone-in) can stay pink. If your thermometer reads 165°F, the chicken is safe to eat, even if there is a slight pink tint. However, the texture should be fibrous, not slimy.
7. Can I use frozen chicken breasts? You can bake from frozen, but I don’t recommend it for the best texture. It takes about 50% longer to cook, and the outside tends to dry out before the inside is thawed and cooked. It also releases a lot of water. For best results, thaw overnight in the fridge.
8. What is the difference between baking at 350°F vs 450°F? Baking at 350°F takes longer (25-30 mins) and can sometimes result in drier meat because it’s in the heat longer. Baking at 450°F (my preferred method) sears the outside and cooks it fast (15-18 mins), locking in the juices. It mimics roasting rather than slow baking.
9. Can I use a glass baking dish? Yes, but keep in mind that glass is an insulator. It takes longer to heat up and holds heat longer. Your chicken might not get as much browning on the bottom as it would on a dark metal sheet pan. If using glass, you might need an extra minute or two.
10. How do I make the seasoning stick? The key is drying the chicken first. If the chicken is wet from the package, the oil and spices will slide right off. Pat it bone-dry with paper towels, then apply the oil, then the spices.
Recipe Card Summary
Here is the quick breakdown for those of you ready to get into the kitchen right now!
- Prep Time: 10 minutes
- Cook Time: 18 minutes
- Resting Time: 5 minutes
- Total Time: 33 minutes
- Yields: 4 Servings
Nutrition Highlight (Per Serving)
Estimates based on a 4oz serving of cooked chicken breast.
- Calories: 165 kcal
- Carbohydrates: 1g
- Protein: 26g
- Fat: 6g
- Fiber: 0.5g
- Sugar: 0g
Instructions (Recap)
- Preheat oven to 450°F.
- Pound chicken breasts to even thickness.
- Rub with olive oil and spice blend (Salt, Pepper, Garlic, Onion, Oregano, Paprika).
- Bake for 15-18 minutes until internal temp reaches 160°F-165°F.
- Rest for 5-10 minutes before slicing.
I hope this guide helps you conquer your fear of dry chicken! This Baked Chicken Breast recipe is truly a staple in my weekly rotation, and I know once you try it, it will be in yours too.
If you make this, please leave a comment below and let me know how it turned out! I love seeing your creations.
Eat well and stay healthy!